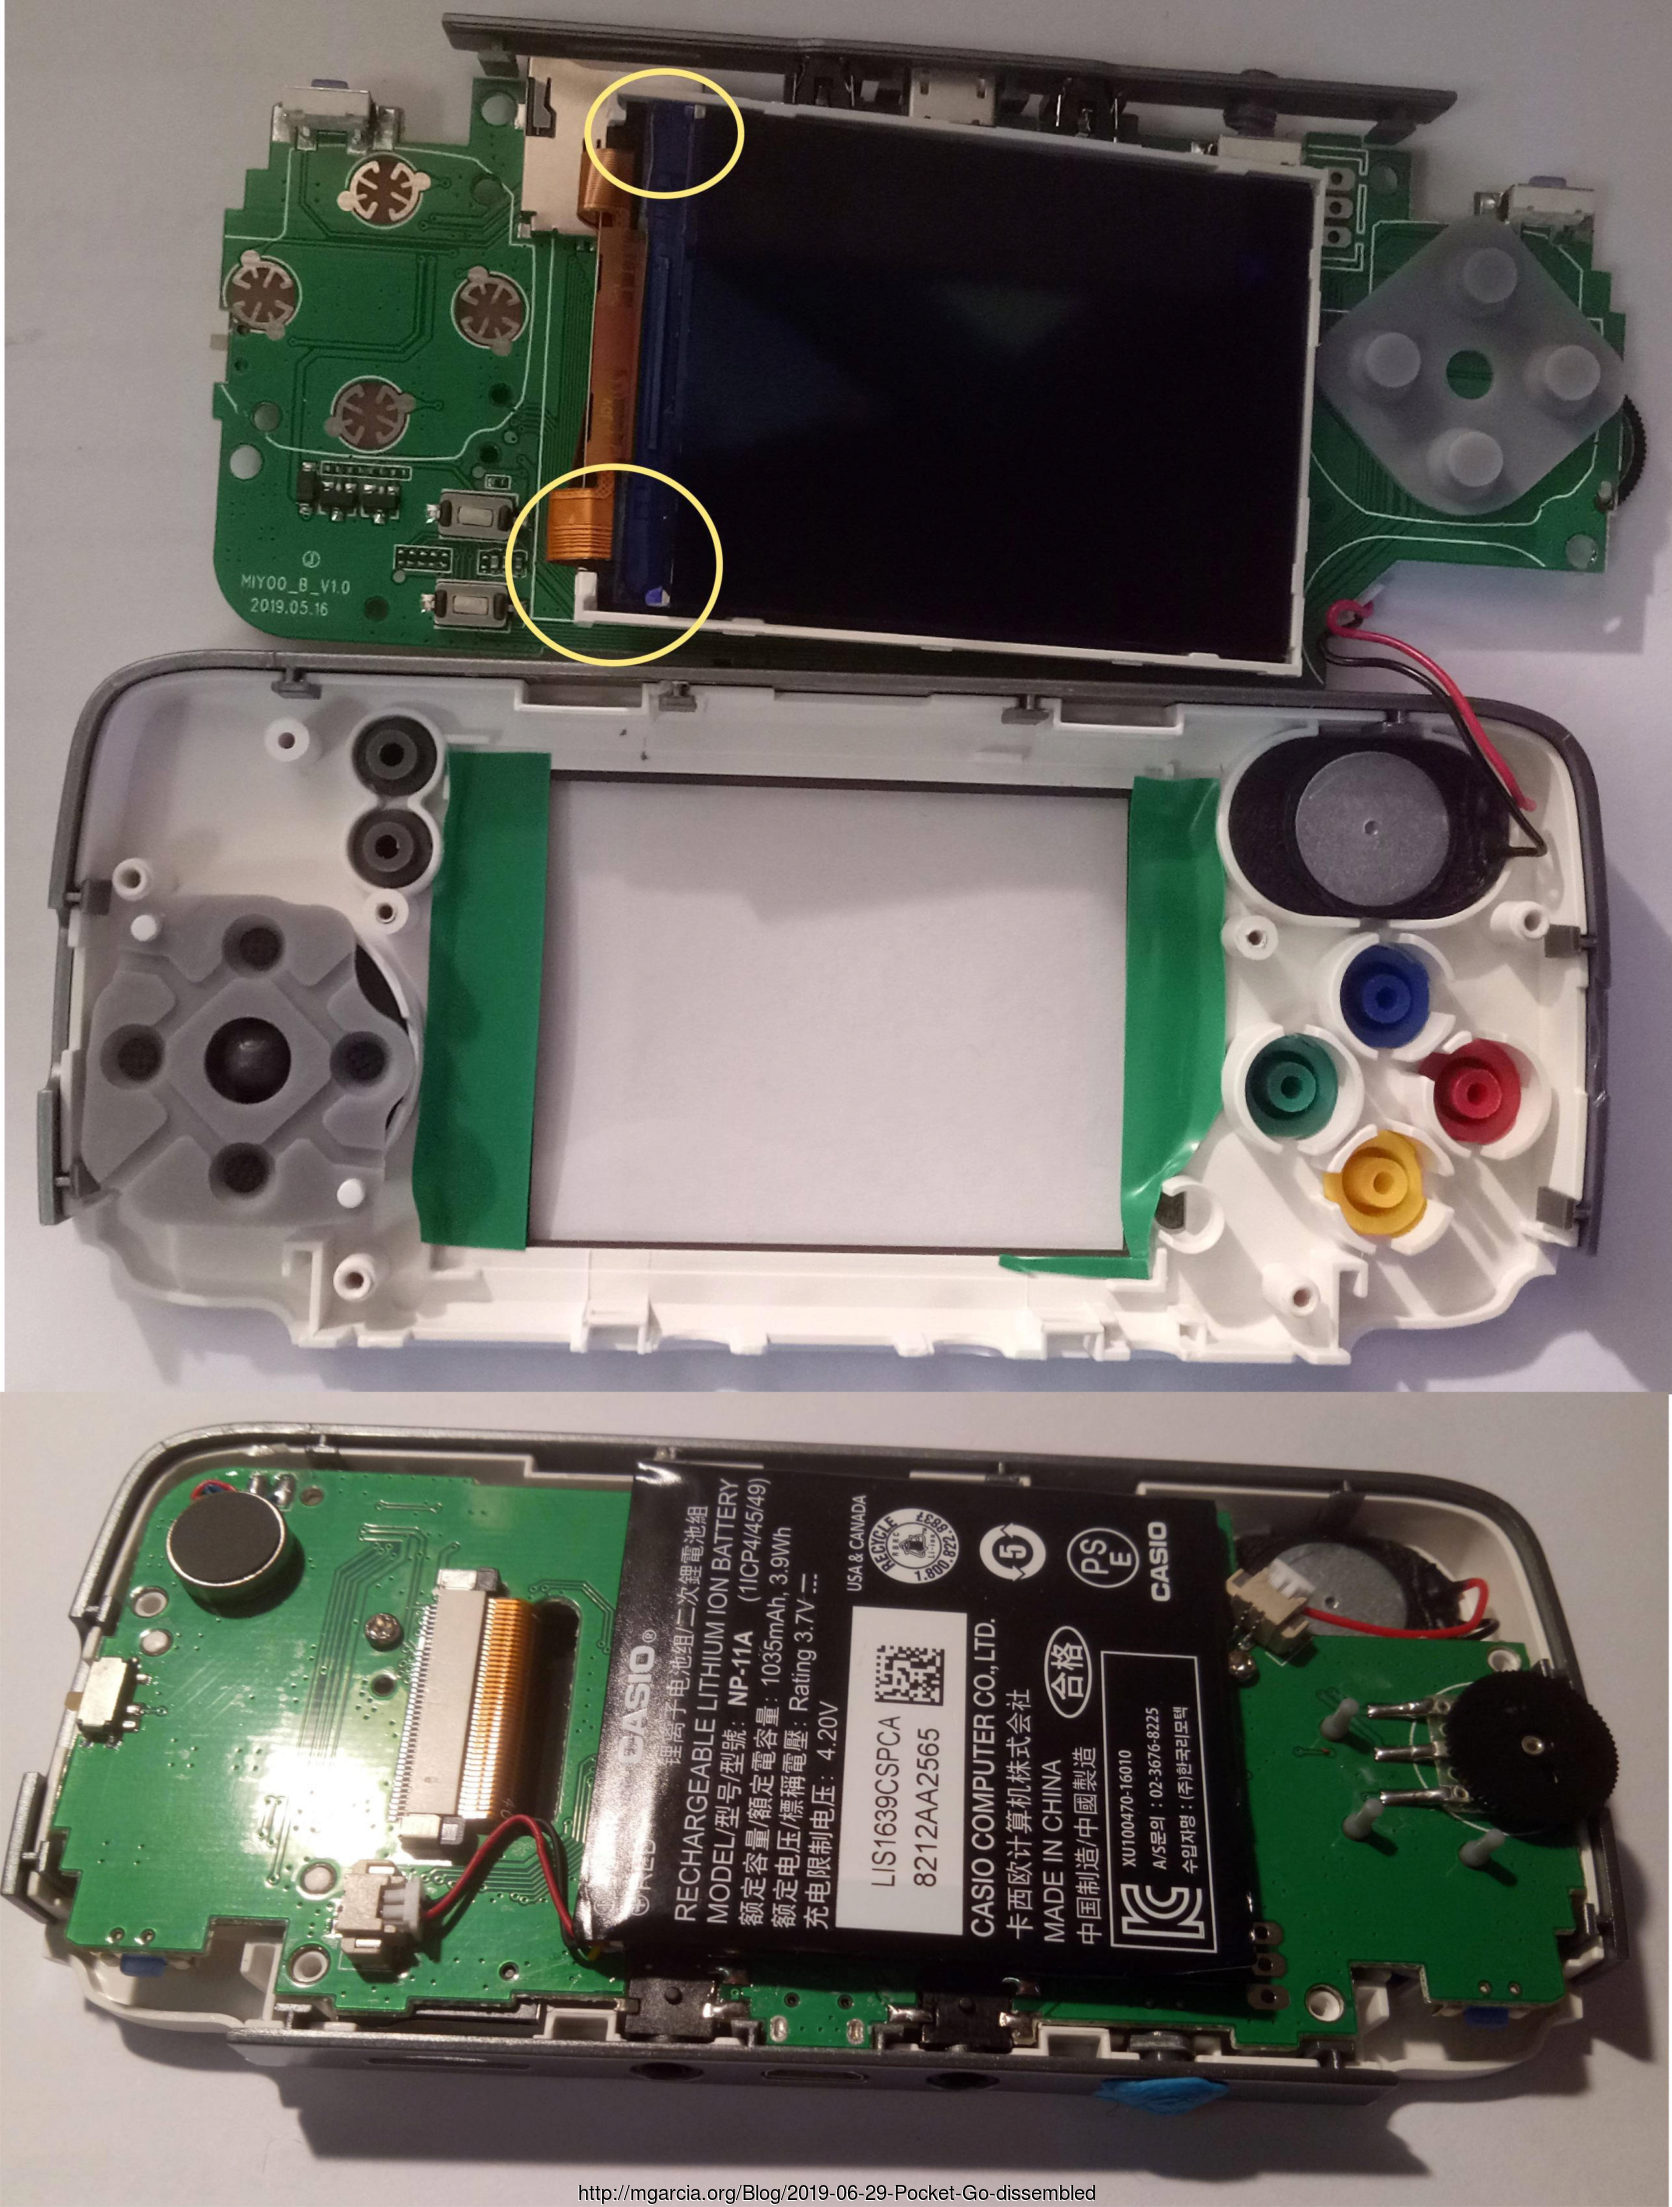
Pocket-Go dissembled
June 29, 2019, at 07:46 AM (2 comments)
Title: Pocket-Go dissembled Author: mgarcia Date: 2019-06-29 15:46 +1000 Tags: 2019, Embedded, Pics, GameDev, Blog Comments: Open
Tips on Pocket-Go disassembly

Click to view original image: 849kb
I bought mine from: https://retromimi.com/products/pocketgo-retro-gaming-system
It's cheap enough, so I bought it and was delivered in about two weeks.
It's not the best quality, but it's sturdy and works okay for what it is. It comes with the typical emulators set up with some ROM and DOS demo games like the ID games from the 80's and 90's, it's the smallest device I've played DOOM and quake!
Anyway, I bought it to dev on, but it's a fun device to play with for sure!
This unit comes with gameboy like face buttons but includes loose SNES coloured buttons, to install it you have to take the unit apart.
It's not too hard if you have taken things apart before, but I wouldn't recommend it for beginners!
The unit also has a lot of light bleed and worth trying to fix, but you'll need some alcohol wipes if you touch the screen!.
I recommend taping up the corners which are circled, it helps!
After unscrewing the back plate, I use "Blu Tack" Removable Adhesive, to hold the face buttons and the start and select buttons to the face.
Remove the back is tricky first time, I use a credit card on the left and right side and shimmy them together until it pops off.
Next, there's two screws and the board and screen lifts up enough to change the buttons and tape up the screen edges.
Assembly is the reverse, just make sure to have the reset, L/R buttons and the on/off switch held in place with blu tack again see bottom image.
I still get light bleed after taping the edges but it's not as bad.


2 comments on "Pocket-Go dissembled"
Im guessing you'd need special paint for the plastic, maybe model kit (planes,etc) paints.